
I receive calls all the time from people who have just moved into a new home that has a reverse osmosis drinking water system.
They tell me that they are happy to have the system, but don’t want to use it because they don’t know what may be growing inside of the system. I tell them to change the reverse osmosis filters and sanitize the system, then they ask the inevitable question. How Do I Sanitize My Reverse Osmosis System?
You can sanitize a reverse osmosis system by adding a disinfectant to the system at its earliest filter stage with the filters and membrane removed from their housings, running the disinfectant through the system, and then flushing out the disinfectant after it has sanitized the inside of the system.
Although a reverse osmosis drinking water system is an enclosed water system that should not be exposed to air which can provide oxygen for bacteria to grow, tiny air bubbles in your water can often remain inside your system and lead to bacteria growth.
Sanitizing the interior surfaces of your reverse osmosis drinking water system when you change the filters of your system will help to stop bacteria from forming and provide healthier water for you and your family.
Things to know before sanitizing your reverse osmosis system.
For sanitizing your reverse osmosis drinking water system, I recommend using an EPA & NSF approved non-bleach sanitizer or about 3 tablespoons of simple un-scented household bleach.
Very important! When sanitizing ANY reverse osmosis drinking water system, it is very important that the membrane is removed from the system.
If a reverse osmosis membrane is exposed to chlorine bleach or any corrosive additive, it may cause the membrane to develop holes in the semi-permeable membrane material.
If holes develop in the membrane, the contaminants in the untreated water can channel their way through these holes and end up in your drinking water.
Things you will need for sanitizing your reverse osmosis system:
1: A new set of filters for your reverse osmosis system, including any specialty filters like a re-mineralization cartridge or UV bulb if your system has an ultraviolet light purification stage.
2: A clean towel (or two). We will be removing water filters from a water filtering system after all, so there is going to be some water to clean up as we go and afterward. Paper towels will work fine also.
3: Sanitized disposable gloves (like these) for handling the filters and membrane.
4: A small clean bucket is often handy for holding the filters or filter housings in so they don’t lay on the ground or spillover if they are full of water.
5: A clean work area and a flashlight so you can properly access and see what you are doing. I like to use this hands-free light that goes right on your head so you can see everything and leave your hands free.
6: Your reverse osmosis filter housing wrench. If you are unfamiliar with this wrench, it looks like a giant magnifying glass that Sherlock Holmes would use. It goes over the outside of the filter housings so you can loosen and remove them.
7: And of course an EPA & NSF approved non-bleach sanitizer.
If you are going to do any work on your reverse osmosis drinking water system, check out my article on What I Use When I Work On A Reverse Osmosis System!
Note: You should NOT use the filter housing wrench for tightening the filter housings when putting them back on. Only tighten the housings’ hand tight.
If the housing leaks after replacing it and it will not stop when you tighten it by hand, you can use the wrench to snug the housing slightly to get the leak to stop.
But first, check out my article on How To Fix A Leaking Water Filter. In Detail, With Images.
Steps to sanitizing a reverse osmosis drinking water system with standard housings:
Step 1: Wash your hands thoroughly!
Step 2: Shut off any ice makers or other water dispensers that use water from your reverse osmosis drinking water system.
Step 3: Turn of the water that is supplying your reverse osmosis.
This is usually a simple valve that is underneath the sink where your reverse osmosis is installed. It is often a white and blue or grey valve that turns on and off with a quarter turn, but it may also be a metal piercing valve that you need to close by turning it clockwise until it stops turning.
Step 4: Turn the reverse osmosis faucet on and let it run until the water stops completely. This will depressurize the system to allow you to work on it.
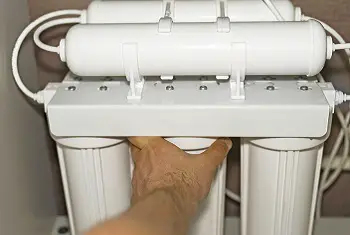
Step 5: Remove the pre-filter and post-filter housings. Many reverse osmosis systems will have these housings clearly labeled so you can not get them mixed up, but if yours are not clearly labeled, you can use a permanent marker or labels to mark the housings.
Also, put the filter information on the system itself so you will know which one goes where the next time you need to remove the housings.
Hint: Some people also like to write a description of what type of filter goes into each housing, write sediment filter 1 or carbon filter 3 on the housings.
You may want to even add the filter model number on the housing so you can easily see which filters you will need for your next filter change.
Step 6: With sanitary gloves on, remove the membrane, sediment filters and post-filters from there housings.
If you are just sanitizing your reverse osmosis and are going to be replacing the existing filters and membrane, be sure to place filters and membrane in a clean container or on a very clean towel or paper towels.
Step 7: Wipe the inside of the housings with a clean lint-free cloth or paper towels. If they seem very dirty, wash them out with mild dishwashing liquid and rinse thoroughly. Be careful not to dislodge the o ring that creates the seal between the filter housing and the system itself.
Step 8: Add non-bleach sanitizer or 3 tablespoons of non-scented household bleach to the first pre-filter housing of your reverse osmosis system, and replace the housing into its original position.
Do the same for the rest of the filter housings and membrane housing, leaving them empty for now. Only hand tighten the housings as we will be removing them again soon.
Step 9: Once you have replaced all of the housings to there original positions, turn the water supply valve back on and watch for water to start coming out of the system’s faucet.
Once you see the water begin to come out of the system’s faucet, shut off the faucet and let the system sit for 2-3 hours.
During this time, the non-bleach sanitizer or household bleach will be making contact with the internal surfaces of your reverse osmosis system and disinfecting them.
Since we added the sanitizer at the very beginning of the system and then turned the water on until the water came out of the system’s faucet, the sanitizer will make contact with all of the surfaces that would normally make contact with the water that you drink.
Step 10: Check for leaks on your system. While your reverse osmosis is being disinfected by the sanitizer is a great time to give your system a once over. Wipe the system down gently with a clean towel, checking for leaks or loose fittings as you go.
Do not attempt to fix any leaks or fittings at this point since the system is now under pressure, but make note of any leaks or fittings that you want to attend to after the disinfection process is complete.
Step 11: Flushing out the sanitizer. After you have let the sanitizer sit in your reverse osmosis system to sanitize it, turn on the system’s faucet and let the water run until it goes down to just a trickle.
At this point, you will have sanitized the inside of your reverse osmosis drinking water system, but some of the sanitizer may still be lingering inside of the system. Shut off the system’s faucet and let the system fill up again with fresh water for 2-3 hours.
After the system has filled for 2-3 hours, open the system’s faucet one more time and let the system empty again.
If you are not confident that all of the sanitizer has been flushed from your system, you can shut off the faucet and repeat the process until you feel that the system is free of the sanitizer.
Once the water has gone down to a trickle again, shut off the water supply to the system once more and wait until the water stops completely. This will depressurize the system again so we can re-install the filters and membrane or install the new filters and membrane.
Step 12: If you found any leaks while the system was being disinfected, now is the time to address them.
Leaks on a reverse osmosis drinking water system are usually caused by an o ring not sealing properly around a section of tubing or a cracked fitting.
You can replace leaking o rings by carefully pulling off the plastic grab rings that hold the tubing in place and removing the o ring that sits just under the grab ring.
I suggest replacing both o ring and grab ring as the o ring stops the leak, but the grab ring holds the tubing in place, so both are very important. Spread a thin layer of silicone-based o ring lubricant on the o ring to create a better seal between the o ring and the tubing.
Before reinserting the tubing into the o ring, be sure the end of the tubing is smooth and free of any sharp edges as they may cut a grove in the o ring when you re-insert the tube.
Step 13: Replacing the filters. Although I highly recommend putting new filters in at this point, if your existing filters are relatively new you may re-use them after the sanitization is complete.
Remove each housing one at a time and insert the appropriate filter into the housing.
I recommend leaving the water in the housing and holding the housing over the sink when inserting the new filters as this will help to minimize air bubbles getting trapped in or around the filters.
When inserting the reverse osmosis membrane and filters, be sure to be wearing sanitary gloves to avoid contamination.
Make sure that the o ring inside of the filter housing is free of any debris and screw housing back onto the reverse osmosis system. Continue replacing all of the filters and membrane and then dry the outside of the system thoroughly.
Step 14: Turn on the water supply to the reverse osmosis and watch for water to start coming out of the system’s faucet. Once you see the water flowing, shut off the faucet and allow the system storage tank to fill for 2-3 hours.
Now that your reverse osmosis drinking water system is producing filtered water, you should empty out the tank at least once before drinking from it to make sure that the water in the storage tank is properly filtered.
Step 15: Turn any ice makers or other water systems that use water from your reverse osmosis system and enjoy your reverse osmosis water as usual.
You may want to dispose of any old ice from your ice maker if you don’t believe that your reverse osmosis system has been working correctly, but if it has been fine, you should be able to just use the existing ice.
Additional stages to consider when sanitizing your reverse osmosis system.
Re-mineralization or Alkalinity cartridges:
If you are sanitizing your reverse osmosis drinking water system as part of your regular filter change, be sure to change any specialty filters or cartridges that are additional stages to your system.
Re-mineralization also sometimes referred to as re-alkalizing of reverse osmosis water is fast becoming a standard stage of many reverse osmosis systems. It usually involves the addition of a cartridge that contains calcite.
This calcite slowly dissolves and neutralizes the acid that is in the water. As it does this it also adds some flavor to the water which is often desired by coffee and tea lovers.
Although this cartridge is not actually a filter, it should be changed whenever you change the other filters of your reverse osmosis after the system has been sanitized.
Ultraviolet sanitization stage:
As the name of this stage implies, it is a stage where the water is passed through a cylinder that contains an ultraviolet light to sanitize the water.
When sanitizing your reverse osmosis system, I advise you to unplug this UV light so that it does not affect the rest of the sanitization process.
The ultraviolet bulb in this stage should be changed every time you change the other filters of your reverse osmosis because the intensity of the bulb diminishes over time and it will no longer be able to sanitize the water as intended.
How to sanitize your reverse osmosis storage tank.
If you have already followed the steps to sanitize your reverse osmosis drinking water system, you have already sanitized the storage of your system tank.
But if you would like to sanitize the storage tank in between sanitization of your whole system. Here is a simple way to do it.
Step 1: As in the complete sanitization process, we need to shut off the water supply to the reverse osmosis drinking water system.
Step 2: Turn on the reverse osmosis faucet until the water stops completely, this will depressurize the system and empty out the storage tank.
Step 3: Disconnect the tube going to the storage tank from the reverse osmosis leaving the tank end connected. This is usually done by pushing the tube into the connector, holding back the retention ring and then pulling the tube out of the fitting.
Step 4: Hold the disconnected end of the tube down at an angle and give it a few shakes to empty the water from it.
Step 5: Now hold the disconnected end up at an angle and put 3-5 drops of unscented household bleach down the end.
Step 6: Wipe off the disconnected end and re-insert it into the reverse osmosis system.
Step 7: Turn the supply water back on and watch for the water to begin to come out of the reverse osmosis faucet.
Step 8: Shut off the reverse osmosis faucet as soon as you see the water start to flow. Now you have added a sanitizer to the storage tank only, without affecting the entire reverse osmosis system.
Step 9: Allow the sanitizer to sit inside of the tank for about 1 hour. This will give the sanitizer enough time to sanitize the interior surfaces of the tank.
Step 10: After an hour has passed, turn on the reverse osmosis faucet and let the water flow until it reduces down to a trickle.
Step 11: Shut off the faucet and let the tank fill for 2-3 hours.
Step 12: Turn the faucet back on, and let the tank empty completely one more time to make sure no sanitizer is left over in the storage tank.
Step 13: Allow the storage tank to fill for 2-3 hours again.
Step 14: Enjoy your great-tasting reverse osmosis water.
Sanitizing a Kinetico reverse osmosis drinking water system:
The overall process of sanitizing a Kinetico reverse osmosis drinking water station is the same as any other standard type reverse osmosis system.
The problem with a Kinetico reverse is that you can’t remove the reverse osmosis membrane from its housing which is very important to protect your systems membrane.
To get past this problem, we are going to use your old filters as dummy cartridges, or you should get an additional non-carbon pre-filter from your Kinetico dealer to use in place of your reverse osmosis membrane.
Note: If you are changing your Kinetico reverse osmosis membrane anyway, you can just leave the old one in place for the sanitizing procedure and then replace the membrane after the system has been sanitized.
Hint: It is easy to get the new Kinetico filters (or any other enclosed filters) and membrane confused with the old ones. I recommend using a permanent marker to write the date on the new filters and membrane before starting a filter change and sanitizing procedure.
Step 1: Shut off the water feeding your Kinetico reverse osmosis.
Step 2: Turn off the faucet until the water has stopped completely.
Step 3: Remove the prefilter (Yellow or Purple) from the back end of the system.
Step 4: Add about 10 drops of household chlorine bleach to the opening on top of the new yellow filter and pre-fill it by slowly adding water to it from the side opening of the top. This is the groove that goes around the middle opening on top.
Holding the filter at a 45-degree angle helps to fill it quicker and easier. Fill the filter from the side groove until you see the water come up from the center.
Install the new yellow filter into the pre-filter opening.
Note: If you have municipal water, you should be using a purple filter during normal operation, but a purple filter contains carbon which will remove the chlorine bleach from the water.
You can get 2 yellow (non-carbon) filters for use only during the sanitization process. Be sure to put in a purple carbon filter in your pre-filter slot after sanitizing is complete.
Step 5: Remove the systems reverse osmosis membrane which is the one right in the center of the system and replace it with either the old yellow filter or a new yellow filter that you will use for sanitizing the system.
Fill this filter with water the same way as the pre-filter but no chlorine bleach is needed.
Step 6: Remove the systems post filter (Orange or Blue) and replace it with a filled yellow filter just as you did with the membrane.
If your system was still flowing well before you started the sanitizing process, remove the white (snowflake looking) piece from the top of the old post-filter, and put it in the top of the new yellow filter.
This will be your (dummy) cartridge whenever you want to sanitize your reverse osmosis system. Use a pair of needle-nose pliers to pull the piece right out and then just push it into the yellow filter.
Note: If you have any additional cartridges on a Kinetico K5 system, they should be replaced the same way as the pre or post-filters.
Step 7: Once you have replaced all three filters as instructed, turn the system’s water back on and allow the chlorinated water from the pre-filter to run through the entire system until you can smell the chlorine coming from the system’s faucet.
As soon as you smell the chlorine bleach, shut off the system faucet and allow the system to sit for 1 hour. After an hour, turn the faucet back on and allow the water to flow for 5 minutes to remove all of the chlorine bleach from the system.
Step 8: Shut off the water feed to the system once again, and wait for the water to stop.
Step 9: If you used a yellow pre-filter for the sanitization process but normally use a purple pre-filter for municipal water, pre-fill the new purple filter and put it in the pre-filter slot where the yellow sanitizing filter was.
If you are on a private well, simply leave the yellow filter that you added the chlorine bleach to in the pre-filter slot and proceed to the next step.
Step 10: Remove the yellow filter from the center slot where the membrane should be and replace the membrane from before.
If you are replacing your systems membrane because it is no longer filtering as needed, prefill the new membrane the same way as you did the yellow filters.
Step 11: Remove the yellow (dummy) cartridge from the post-filter slot and replace it with the water-filled new post filter.
Step 12: Replace any additional filters in the same way as you replaced the pre and post-filters.
Empty the old filters that you plan on using for the next time by standing them upside-down until empty and let them dry thoroughly. Store them in a clean plastic bag for use in the future.
Step 13: Turn the system’s water back on and allow the system to fill for 3 hours.
Step 14: Turn on the system’s faucet and allow the storage tank to completely empty, then allow the storage tank to fill with new filtered water for about 3 hours.
Step 15: Resume enjoying your reverse osmosis drinking water system
When should you sanitize a reverse osmosis drinking water system?
Since sanitizing your reverse osmosis is very beneficial and also not all that difficult to do, I highly recommend that you should sanitize your reverse osmosis system every time you change your reverse osmosis filters.
As a rule of thumb, I recommend changing your reverse osmosis filters once per year. But if you are only using a small amount of reverse osmosis water per day, changing your filters every 18 to 24 months may be adequate for your reverse osmosis system.
If you are very diligent about changing your filters every 18 to 24 months and you are using water from your reverse osmosis drinking water system on a daily basis, sanitizing your system every 18 to 24 months would be fine.
If you only use your reverse osmosis drinking water system on a part-time basis, like in a summer home or when the kids are home from college, you should consider sanitizing your system yearly even if you do not intend to change the filters.
If you have a large family that uses a large quantity of reverse osmosis water, you may find that you are changing your reverse osmosis filters more often than once per year.
If you are using large amounts of reverse osmosis water, the water inside of the system will tend to stay fresher and reduce the chance of any bacteria growth within the system. If this is the case, sanitizing your system yearly would be adequate.
Don’t forget to sanitize the reverse osmosis faucet!
Your reverse osmosis drinking water systems faucet is exposed to the open air, and therefore it is exposed to germs and bacteria growth. When sanitizing your reverse osmosis system, be sure to clean the faucet opening.
This is the contact point where bacteria can start growing, so sanitizing it is just as important (if not more important) as sanitizing the rest of the system.
Start by cleaning the end of the faucet with a little dishwashing liquid and water to remove as much of the external build-up as possible.
Next, take a little bit of unscented household bleach on a pipe cleaner or a clean paper towel that you have twisted to a point, and run it down the faucet opening as far as it can go. Twist and turn it in all directions to get the bleach everywhere you can inside of the faucet.
You can do this multiple times until you see the pipe cleaner or paper towel comes out clean. Run a pipe cleaner or paper towel down the faucet one last time with water only to remove extra bleach from the faucet.
When you are satisfied that you have clean out the inside of your faucet as best as you can, wipe the outside clean with some water, and run a few glasses worth of reverse osmosis water through the faucet before you start drinking from it.
Things to check while you are sanitizing your reverse osmosis system:
Check the fittings going in and out of the system for any leaks or cracks.
Leaking fittings are often just an o ring inside of the fitting that is not making a proper seal around the tubing that goes in the fitting.
Often, you can simply remove the o ring from the fitting and replace the o ring to solve a leaking problem. Put a thin layer of a silicone-based o ring lubricant on the new o ring to help it seal better, and to allow the tubing to slide into it easier.
If you have changed the o ring and the leak continues, the fitting may be cracked and need replacement. Most fittings on reverse osmosis drinking water systems use 1/4 inch and 3/8 inch fittings and tubing.
If your fitting does not appear to be one of these, be sure to get the advice of your local plumbing or hardware person to get the correct fitting or use a different fitting to replace your old fitting.
Check that there are no obstructions that may damage your reverse osmosis system.
Often, reverse osmosis drinking water systems are installed underneath the kitchen sink. This is often also the place where you store cleaning products and other kitchen products.
Since you are working in that area anyway, take a quick look around to make sure there is nothing that is too close to your reverse osmosis.
Move any objects that may hit tubing or fittings on your system, place larger objects in front of your reverse osmosis system to help to protect it from daily taking out and putting in of items stored next to the RO.
Make sure to dry the area thoroughly after working on your RO.
Drying the entire area very thoroughly is very important in preventing the growth of mold and mildew. Also, it is a great way to check for leaks or debris.

Hi there!
I bought a Kinetico K5 RO system last May and was planning to buy the replacement cartridge to change the system in the coming months when the indicator light goes off. I would like to do this myself and it looks pretty easy. However the manufacturer says you have to sanitize the system before changing filter and the process looks too complicated for me to do on my own. How often does the system really need to be sanitized if im using it daily?
thanks!
Hello Komal, and thank you for the question.
I’m glad that you mentioned that you use your reverse osmosis water every day. Using your reverse osmosis every day will help to reduce the chance of bacteria growing inside of the system. I also recommend flushing out the storage tank completely every few months, just to keep the storage tank as clear as possible.
A reverse osmosis system is an enclosed system that should not have any air inside of it that can encourage bacteria growth, but sanitizing your system every year or so is a good idea. Your Kinetico K5 should be using an Orange post-filter and either a yellow pre-filter for well water or a purple pre-filter if you are on municipal water supply.
If you are using municipal water, sanitizing is not needed very often because your water should have been treated by your municipal water supplier. But if your water is coming from a private well, here’s a simple way to sanitize your system the next time that you change your filters.
I recommend putting the date on your new filters so that you don’t get them mixed -up with the old ones and filling your new cartridges with water to prevent air pockets.
Turn on the RO faucet, and fill the new filters by holding them at a 45-degree angle, filling them down the side channel around the top of the filter. When you see water come up from the center, the filter is full of water.
Shut off the feed water going to the system and turn on the faucet to de-pressurize the system.
Remove the old yellow pre-filter from the system by turning it a quarter turn, then give it a wiggle, and pull it out. Remove the membrane which is the cartridge in the center of the system (it should have a green label on the top of it) in the same way.
Now put the new yellow filter where the membrane was, empty a little water out of the old yellow filter and add about 6 drops of household chlorine bleach into the old yellow filter, then replace it where it was.
Now turn the water to the system back on, and let the water flow out the faucet until it stops. You have now run a small dose of chlorine through the system which will help sanitize the system.
Shut the water back off again, replace the membrane, replace the old yellow filter with the new one, and then change the orange filter. Turn on the water, and you are done.
Keep the old yellow filter to use as a dummy cartridge in place of the orange filter the next time that you do this, and you will get the chlorine bleach through the entire system.
See my article about How Often To Change Your RO Filters, and how to do it for more details.
I hope this was helpful!
Paul
Nice guide on sanitizing the system when changing filters. In this case all pre-filters are removed before sanitizing and after all filters including post filters are replaced.
What I can not seem to find is a guide for sanitation of a newly installed system. The difference being that the post filters are new and not going to be replaced. What is proper procedure in this case? Can or should sanitizer be run through the post filter(s)? Keep in mind that many post filters are self contained inline units (i.e. don’t have a housing with a removable insert) so if left in place they will be filled with sanitizer. Perhaps they should be bypassed?
Myself, I installed a new system, and after reading sanitation guides, ‘tested the seals’ with tap water, thinking I’d sanitize after. Seals worked, but now my post filter is contaminated with low quality tap water. Not sure if I can just run sanitizer through it (bleach solution or hydrogen peroxide ) and use it still or if it needs to be replaced.
Hello Jon and thank you for your question.
For the most part, a newly installed reverse osmosis system will not need to be sanitized at all. Because a reverse osmosis system is an enclosed system, there should be little to no air getting into the system and therefore no opportunity for bacteria to grow.
I normally recommend sanitizing a reverse osmosis system yearly or even every 2 years as long as you are using the water regularly to prevent stagnant water from staying inside of the system.
If you would like to bypass the post-filters to sanitize the entire system, you can always use a coupler to connect the tubing when you remove the inline post-filters. Because the post-filters will normally have carbon in them, the sanitizer will not make it past the post-filter.
I would say that the post filter in question is probably just fine, I would let the system fill the storage tank completely and then run the system until the tank is empty. Do this 2-3 times and your water should be just fine.
I hope this was helpful.
Paul
Hi, this article is exactly what I have been looking for. I have had a K5 RO system for about 6 years now and my local rep kept telling me sanitation (city feed) was never required although the manual clearly states it is.
I have called Corporate and they all seem clueless on getting me a kit for this or acknowledging the need, but after some Google searching I finally convinced them that it should be done on at least some frequency. They sent me some plastic housings that are physically the size of the filters (at a cost of course) that appear to possibly be for a K3 system. I am planning to use these 3 empty plastic housing in place of the (3) filters I remove during annual change this weekend. I was trying to find some non bleach disinfectant, but too hard so will use bleach and it looks like you say 6 drops?
I also have this hooked up to my refrigerator for water and ice and since my K5 system is remote from the sink in the garage (about 30 feet away) I had to have a little booster bladder installed at the refrigerator to get ice maker working. My plan is to turn off the ice maker and run water out the dispenser to get bleach sanitizer in the line and bladder and hope the refrigerator piping will not be hurt (don’t think so but?)
I know there is air in my line during normal operation as my ice is not clear on an icemaker that has only ever had RO water through it, so not sure why the local reps says this is completely unnecessary.
Thanks again for this great info!
Dave
Hello Dave and thank you for the comment.
Yes, 6 drops should be fine but you can add a few more if you like (maybe 8 total) because your system is so far away and you are also sanitizing your refrigerator line. And make sure to let it sit in the system for a few hours before running it out. Then let the system fill for 3+ hours and empty out the tank one more time before using the water.
Glad that I was able to help.
Paul