
Updated: Feburary 27, 2023
Many people that get their water from a private well have a problem with sediment in the water and need to use an in-line sediment filter to remove it. You go to change the filter cartridge in the filter housing and when you’ve got it all back together, you see a little drop start to form where the bottom meets the top, and you have a leaking water filter.
Now, what are you going to do now that you have a leaking water filter?
First of all, don’t panic, and don’t run off to call a plumber to replace the whole unit just because we have a little leak.
Let’s check a few things to see if we can fix this leak and save you a costly visit from the plumber.
Here’s What We Are Going To Do!
- Identify Where The Leak Is Coming From
- Get To The Location Of The Leak
- Fix What Is Causing The Leak
- Replace The Water Filter Cartridge And Housing
- Check Our Work
Steps to fix a leaking water filter.
- Shut off the water supply going to the leaking water filter by turning a ball valve lever 1/4 turn (90 degrees).
- Depressurize the filter by turning on the water faucet after the system until the water stops.
- Shut off the water after the filter if possible.
- Unscrew the leaking filter housing.
- Check and clean the housing and O ring that seals the filter housing.
- Lubricate the O ring with silicone-based lubricant and place it back in its channel.
- Replace housing and hand tighten.
- Turn the water back on and check for leaks.
If you are going to do any work on your reverse osmosis drinking water system, check out What I Use When I Work On A Water System!
Tested and certified by NSF International against NSF/ANSI standard 42 for the reduction of 94.2% chlorine, taste, and odor, and NSF/ANSI 372 for lead-free material. You are ensured of a safe and reliable drinking experience at all times.
How To Properly Change Your Water Filter To Prevent Leaks?
If you have never changed your whole house water filter before, watch this quick video to familiarize yourself with how to regularly change your home’s water filter.
Now Let’s Find Out Why Your Water Filter Is Leaking.
The most common reason that I have found for a water filter to leak is dirt or grit on the Oring that seals the housing, so let’s first make sure that we check that first!
Shut off the water feeding into the filter. This is done by turning a valve lever 1/4 turn or shutting off a valve that looks like an outside hose handle. Turn on a water faucet and wait until the water stops completely, then shut off the water after the filter housing if there is a shut-off.
Using a wrench included with the filter housing, carefully unscrew the bottom (Sump) of the filter housing counter-clockwise from the top (Head) of the housing while supporting the housing head and plumbing.
Sometimes it can be difficult to remove the bottom sump of the filter housing. If so, try using two wrenches on opposite sides of each other so you can use both hands while someone else supports the housing head and plumbing.
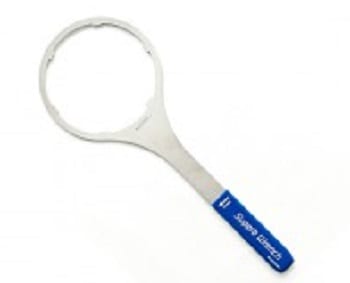
If you can’t find your original filter wrench or just would like a longer and stronger wrench to make your job easier, I found this great EXTRA LONG (for more leverage) “Steel” filter wrench that I can’t recommend enough! It’s stronger, and longer than a plastic wrench and makes filter replacement a breeze!
Check it out at Discountfilterstore.com
Detailed Instructions For Shutting Off Your Water And Taking Apart Your Water Filter Housing.
Most of the time the water is coming out from where the bottom container part of the housing( this is called the (sump) meets the top (head) of the housing. If this is where the leak is originating, continue reading below and we should be able to fix this problem.
Shutting Off The Water Going To The Water Filter Housing.
Ok, let’s get the water shut off before the filter, and release the water pressure. If you have changed your filter before then you already know how to do this part, but for those of you that don’t, here’s what we are going to do.
We have to isolate the filter housing so there is no water running to it from your water source, and no water running back to it from your home.
There are usually water shut-off valves not too far from the filter housing in either direction. One shut-off before the filter and often one after the filter.
First, shut off the water before the filter.
This will likely be a lever that is right by the blue or sometimes grey water storage pressure tank. Once this is shut off, we want to make sure that the water is off by turning on the cold water at a sink inside the house that you know is used on a regular basis.
The kitchen sink is usually a perfect example. Turn on the faucet and let it run until the water stops. Now we know that the water to the house is off.
Shut off the water after the filter. Now, let’s look for a shut-off lever or hose spigot-type shut-off to isolate the filter from the rest of the house. This is often not far after the filter housing.
Releasing The Water Pressure In The Filter Housing.
Next, we want to be sure that the pressure inside the housing is released, this is done by pressing down on the red button that is on top of the housing.
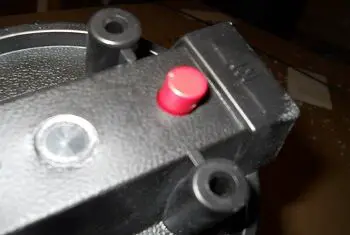
When you press this button, a small amount of water may dribble out along with a little burst of air. This is exactly what is supposed to happen so don’t be alarmed, this is simply releasing whatever pressure might be left inside the housing.
If you press down the red pressure release button and water sprays out, the filter housing is still under pressure and you have not shut off the water correctly.
Removing The Water Filter Housing Bottom (Sump).
Once we have the water shut off before and after the filter housing and the water pressure is released, we can now unscrew the filter sump.
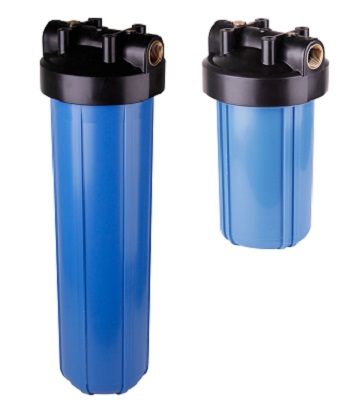
This is the bottom part of the housing that may look a bit like a large blue, clear, or white test tube or a large blue drink tumbler.

This sump should unscrew counter-clockwise if you were to be looking at it from underneath the bottom of it looking up. The rule of thumb, righty tightly, lefty loosey does apply here if you are viewing it from under the housing.
Also, if you put your left hand on the housing and the housing is on your left-hand side, the sump will unscrew by turning it clockwise.
HINT: You might want to grab a bucket, a towel, and maybe someone else to help you.
Take the sump wrench that came with the filter housing (It looks like a giant magnifying glass that Sherlock Holmes would have used, but without the glass in it), and slide it up over the sump from the bottom over the grooves in the sump until it fits snugly towards the top of the sump.
If you are missing your water filter housing wrench, you can get a replacement at Discountwaterfilters.com.
Then, while holding the top of the housing with one hand, gently rotate the sump until it becomes loose, then use your hands to unscrew it from the top.
Removing The Sump (Bottom) Of The Filter Housing.
I recommend supporting the sump with one hand while rotating it with the other as the sump contains water and we don’t want to spill too much of it on the floor.
Now that we have the sump off, let’s take the filter cartridge out. “But don’t pour the water out yet”, we may use it to rinse out the sump. Now you can set the sump inside the bucket if you like as we are going to take a look at the O ring that is inside it.
Checking The Filter Housing O Ring.
Do not remove the O ring yet! Chances are that the underside of the O ring is just fine, and it is not the cause of the leak. We are going to inspect the top of the O ring without removing it if possible.
The reason why we are not going to remove the O ring is that they sometimes stretch and can be difficult to put back in. And sometimes will not go back in at all.
Run your finger lightly over the top of the O ring, you will most likely feel some grit or bumps as you go over it. Go around once or twice then wipe off your finger and run over it again until you feel a smooth even surface. Now use a little water to rinse the top of the O ring so it is free of grit.
Do I Need To Put Lubricant On A Filter Housing O Ring?
I recommend putting a small amount of silicon-based food-grade lubricant on the top of the O ring, this will help the seal between the O ring and the housing, making it less likely to leak.
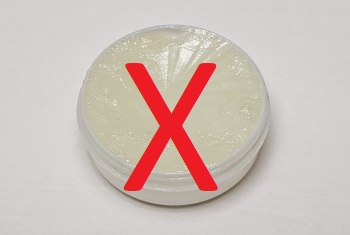
Warning!!! : Do NOT use Petroleum Jelly on the O ring as it will break down the rubber and cause the O ring to expand and not fit properly.
As you remove the bottom of the housing, be aware of the O ring that sits on top of or just inside of the container.
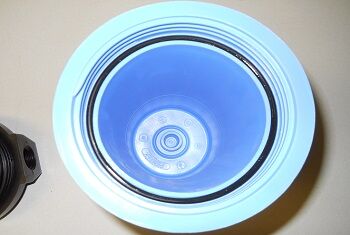
Cleaning And Lubricating Your Filter Housing O Ring.
If this O ring has come out of its channel, place it aside to be cleaned and returned to its proper position. If the O ring is still sitting in its correct channel, leave it there for now, and be careful not to knock it out of its channel.
If you find that the O ring is worn or no longer fits properly in the housing channel, see my O Ring Identification page to locate a new O ring for your water filter housing.
- Lightly run your finger over the O ring to remove any debris that could be causing the O ring to not create a good seal.
- Apply a small layer of silicone-based lubricant to the O ring.
- Now carefully screw the housing bottom back onto the housing top and hand tighten.
You may use the wrench provided for the housing to snug the housing up, but only snug it a tiny bit.
DO NOT OVERTIGHTEN THE FILTER HOUSING!
Overtightening the filter housing when you put it back on may make it much harder to remove the next time that you have to change the filter cartridge.
Slowly turn the supply water back on and check for leaks. If the leaking continues, read further for more detailed instructions on identifying the cause of the leak.
What If My Water Filter Still Leaks After I Have Cleaned It?
Most leaks on home water filters are simply the result of a small piece of grit that gets caught between the rubber O ring inside the housing and the housing container itself.
Clearing this debris and making sure the O ring creates a proper seal will usually stop the leak. So let’s take a look and find that pesky debris. If you have well water that contains sediment, you more than likely have a sediment filter that you have to change regularly.
After you have changed it a few times, it becomes a pretty routine process. Until the time when you change it and you see that drip of water slowly running down the outside of the filter housing.
Replacing The Filter Housing O Ring.
Now if the O ring has come out of the housing or you removed it to clean and lubricate it, we want to make sure it is very clean as is the channel in which it sits.

Wipe out the channel that the O ring sits in with a clean towel then gently wipe off any dirt or grit from the O ring by running it through your fingers.
Do not squeeze the O ring with your fingers as this can cause it to stretch. Put a small film of silicone-based lubricant over the entire O ring before putting it back in to help it make a good seal when you replace the housing.
If the O ring seems like it is too big to fit inside the channel that it came out of, it has most likely stretched a bit over time. By adding a thicker layer of the silicone lubricant, you should be able to get it to set properly.
If the O ring will no longer fits into the channel, it may have expanded due to exposure to chemicals like chlorine or petroleum jelly (vaseline).
Or if the O ring has developed flat areas on it due to age or pinching, the O ring should be replaced.
What To Do If The O Ring Will No Longer Fit Into The Channell.
You should “ALWAYS” keep a few spare O rings handy for your water filter housing for times like this when you simply can’t get your filter housing to stop leaking or the old O ring will not fit anymore.
In a pinch, if you “ABSOLUTELY” can’t get the O ring to stay in its channel and you must have water right away, you can try cutting out a very tiny section of it to make it fit properly.
You should only need to cut out a very small amount, maybe 1/16 of an inch to make it fit.
Remember that you can always cut away a little more if necessary, but you can’t put more back on it. Only try this if it is a matter of water or no water in the home.
And get yourself a few NEW O rings as soon as possible.
I highly recommend having at least two extra O rings available, just in case you are unable to replace the existing O ring because it has expanded or if you lose the O ring during the changing of the inline filter cartridge.
Where Can I Get A New O Ring For My In-Line Filter Housing?
There are two common sizes of filter cartridges used for most home filtering applications. The most common is a cartridge that is 2.5 inches in diameter and the larger size is 4.5 inches in diameter.
But just because the filter cartridge may fit different housings does not mean that the O rings are the same for all housings. Be sure to check your exact size O ring diameter and thickness when ordering online as there are similar-looking O rings that may not fit your housing.
If you don’t have a backup O ring, check out my O Ring Identification page to find the correct O ring for your water filter housing.
If you are in need of a new one immediately, leave your water off and bring the old one to the hardware store. This way you can match it up as close as possible to one that they have at the store.
Now, with the O ring back in its channel, place the new filter cartridge in the center of the housing, be sure that it sits over the top of the nub at the bottom of the housing.
- Center the housing into the head and screw the sump back onto the head using only your hands. Do not use the wrench to put the sump back on as it will make it much harder to remove it next time.
- Hand-tight will normally be tight enough to create a good seal and not cause difficulty for future changes. The filter cartridge may not be in the housing correctly.
Can You Use Teflon Tape On A Water Filter Housing?
Some people recommend putting some plumbers (Teflon) tape on the threads of your water filter housing to make it easier to put on and take off.
“Although Teflon tape may make it easier to put a water filter housing back on, it also makes it easier for you to over-tighten the housing which can make it more difficult to take off the next time.”
If you are going to add some Teflon tape to the threads of your water filter housing, be sure to only hand tighten the sump just enough to create a good seal and be very careful NOT to over-tighten.
Removing Sediment From Your Filter Housing That Could Cause It To Leak.
When you remove a filter cartridge from the filter housing, sometimes a little bit of debris can be left behind. If this debris gets underneath the new filter cartridge that you are putting in, it may prevent the housing from going together properly.
If the housing does not screw in all the way, there will be insufficient pressure on the O ring to create a good seal and you could have a leak.
When you remove an old filter cartridge, always be sure to check for dirt and debris in the center of the housing where the center of the filter cartridge sits.
By making sure that this area is clean, your new filter cartridge should sit down properly and the housing should be able to screw on completely, giving you a waterproof seal.
There Could Be A Crack In The Filter Housing.
Just like anything else in a household, a water filter housing can get hit by something, or something could fall on it and damage it. This can cause the bottom part of the housing (the sump) to push against the top of the housing and cause it to crack.
Even the tiniest crack can allow water to seep through and leak, and trying to tighten the housing will more than likely make it worse.
If you have thoroughly cleaned the bottom sump out and tried a new O ring with a thin layer of silicone lubricant on it and your filter housing is still leaking, you may have a cracked sump.
Most likely, you will NOT be able to see a crack in a water filter housing as it will only expand when the housing sump is installed. But if you have tried everything else and your filter housing is still leaking, it is very possible that the housing has developed a crack in it.
There is not much that you can do to repair a cracked sump that will work long-term, so at this point, it may be time to replace the whole housing.
Most housing bottoms (sumps) are not interchangeable so you are better off getting a new filter housing. They are not very expensive and you will probably sleep better at night knowing that you have a nice new filter housing. How to replace your inline filter housing.
How To Fix Leaking Red Pressure Release Button?
On some housings, the leak may be coming from a pressure release button(usually red in color) on top of the head. This button is to release the water pressure from the housing in order to change the filter cartridge.
This is not common, but if this is where the leak is, just push the button down several times while the housing is under pressure and you may release the debris that is preventing it from sealing. There will be water spraying out when you do this, so have a towel handy.
I usually put a towel right on the top of the housing and depress the red button with the towel covering it to keep the spraying water to a minimum. If this does not stop the leak you may have to replace the o ring underneath the button or have your plumber replace the whole housing.
How To Get To The O Ring Of A Pressure Release Button?
To get at the o ring underneath the pressure release button, you will have to shut off the water, release the pressure, and remove the bottom part of the filter housing called the sump. When you have removed the sump, you will be able to see a small screw right underneath the red button.
This screw is usually a Phillips head screw and has a small o ring on it. Carefully remove the screw and o ring, then remove the o ring from the screw.
If you find that there is dirt on the O ring, you might be able to clean and lubricate the O ring and re-use it. If not, replace the O ring by adding a tiny bit of silicone-based lubricant to it, and tighten the screw snugly but do not overtighten.
Replace the filter and sump to the housing and slowly turn the water back on. Check for leaks, and you are done. If the leak continues at the button, there may be a crack in the housing and it may need to be replaced.
How To Replace A Whole House Water Filter?
Replacing the whole housing is actually pretty easy. Most of the time they are attached by threaded fittings on each side of it that are simply tightened up just like tightening a nut on a screw.
If you have Pex piping you can usually loosen the threaded fittings simply by turning them when they are still connected to the Pex piping. First, we need to shut off the water going to the filter housing and then run the water at a sink until the water stops flowing.
Now that we have the housing depressurized, turn the fittings until the housing comes loose. Before installing the new housing, be sure to remove any leftover Teflon tape or other substances that are left in the threads that will be going into the housing.
Once the threads are clean, wrap some Teflon tape around the exposed threads in a counterclockwise direction. Be careful not to use too much, about three full wraps around the threads should work fine.
The Teflon is only used to make sure that the threads are able to screw in an entire way, so you don’t need much. Slowly and carefully thread the new filter housing on just as the old one came off, making sure that the new one is threaded in completely but without over-tightening.
Once you feel confident that the new housing is on correctly, install a new filter cartridge and gradually turn the water back on. Check for leaks and you are done.
If you do decide to replace your in-line filter housing, I recommend that you do use a non-see-through soft-plastic filter housing.
I highly recommend the filter housings available at Discountfilterstore.com
Although you may like the idea of seeing through the housing to be able to see if the filter cartridge is dirty, the clear housings are more brittle than the soft plastic ones so they can crack more easily.
How To Fix A Leaking Reverse Osmosis Water Filter.
If it is a filter on a reverse osmosis system, try swapping the housing with another. The filter housings on most reverse osmosis drinking water systems are basically the same as a larger in-line whole-house filter housing.
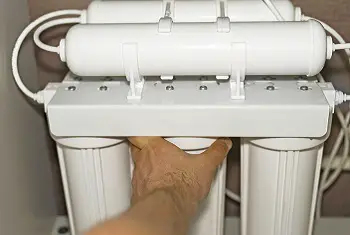
Be sure that the housing is clear of dirt and debris. Clean and replace the O ring seal and then see if the leak is fixed.
If the leak continues, try switching the leaking housing with one of the other housings. If the leak is now coming from the same housing even though it is in a different spot, then double-check and replace the O ring.
If the leak continues, then the housing may be cracked. If the system continues leaking from the same spot as before even though you have switched housings, then there is something wrong with the system itself and not just the housing.
Clean inside the reverse osmosis systems undercarriage where the filter and filter housing are connected and rinse the area thoroughly, then try reinstalling the filters. If this does not stop the water leak then you may need to consider getting a new reverse osmosis system.
What To Do After The Leak Is Fixed.
Naturally, you will have to clean up any water that has gotten onto the floor due to the leaking water filter. If you just need a towel to dry up a small area then great. But if you have more than just a little puddle to clean up, be sure to take some things into consideration.
If you plan on using a wet/dry vacuum for the cleanup, be very careful with the electrical cord and plan ahead for the emptying of the vacuum. Don’t let the vacuum get so full that you can’t get it to where it needs to go to empty it.
You also don’t want to let your vacuum get so full that you might spill it.
Think Ahead So You Are Not Doing Double The Work.
Be careful of electrical boxes or other electrical outlets. When working with water you should always stay clear of anything electrical, and avoid direct contact with the water whenever possible.
If you find areas of water that appear to have any type of debris in them, sweep away the debris before vacuuming up the water in case there is anything sharp or potentially harmful in it. Be extra careful if you believe that there may be any broken glass lying underneath the water as it can be very hard to see.
Now that we have your leaking water filter under control, you may want to consider some preventive measures in the case of a water leak occurring again.
Many of my customers have told me that they have been using very simple leak detectors as a precautionary measure against leaking water in the home and several have told me that they saved their homes from major flooding issues.
Not All Filter Cartridges Are The Same.
Just because a filter cartridge will fit inside your filter housing does not mean that it will best fit your needs. There are three common types of filters that you will readily find in your local hardware store, each having there own unique specific uses.
Not that anyone is better than another, but they each are used for different reasons depending on your specific needs. These filters come in 2.5-inch and 4.5-inch diameters, by 10-inch and 20-inch lengths.
The most commonly used is a simple sediment filter. This filter is used to remove dirt, sand, and debris that you can easily see and can cause blockage in your water-softening system and screens on your faucets, washing machine, and other appliances that have screens to keep out sediment.
Sediment filters come in different styles and micron ratings. You will usually see them ranging from as high as 50 microns to as low as 1 micron. The micron rating is just an indicator of how large (50 microns) or small (1 micron) of a particle the filter will filter out.
Filter Cartridges Also Come In Different Shapes.
There is the pleated type that has much more surface area to catch more debris and is usually only for larger particles ranging from 15 microns and up, but can be found in as fine as 5 microns.
A spun-polypropylene filter is a solid white filter that is most commonly a 5-micron or less filter but can also be found as a dual-gradient in the 4.5-inch size.
This means that the outside of the filter will filter a larger-sized particle, and finer particles the closer you get to the center of the filter. A string-wound filter is a fine particle filter that is usually for filtering from 5 to .5 microns.
This filter is for water that contains fine particles only as larger particles will quickly clog it and cause a drop in water pressure in the house. It is often more expensive than a pleated or spun-polypropylene filter, and not as readily available in most hardware stores.
No matter which type of sediment filter you use, I highly suggest using only polypropylene or polyester filters as cellulose (paper) filters can tear easier and allow debris to get through.
Why Granular Activated Carbon (GAC) Filters May Cause Leaks.
Granular Activated Carbon (GAC) filters are used to remove the chlorine if you are on a municipal water supply that uses chlorine to sanitize the water before getting to your home. These are also used to remove mild odors and bad taste in the water.
They are not for sediment but can be used if you have minor sediment issues. Carbon block filters are used in a variety of ways, they are used as a sediment filter as well as for the removal of Chloramines, Cysts, Lead, and other specialty uses.
They tend to be more expensive because of their unique filtering uses so unless you have any of these special needs, they will likely be more than you will need.
Some Granular Activated Carbon (GAC) filters do NOT compress as a standard water sediment filter will.
Granular Activated Carbon (GAC) filters that are solid filters that contain Granular Activated Carbon (GAC) in it will NOT compress as a carbon-embedded filter would.
Therefore, if there is any sediment built-up in the bottom of the filter housing, it may cause the Granular Activated Carbon (GAC) filter to sit higher than it should and not allow the housing to screw in tight enough to create a good seal on the housing O ring. In other words, water can leak past the O ring.
To Sum Up:
Ok, now that you know what kind of filter to use and are a pro at how to change your filter cartridge, be sure to change your filter as needed and you may want to keep a few backup filters on hand along with a new O ring in case you need it.
If you are missing your housing wrench, there is a universal type of wrench called a belt wrench. This wrench can fit on almost any water filter housing and is great for many other household chores.
Get some spare O rings and O ring lubricant HERE so you have them available in an emergency.
Understand What’s In Your Water!
Easily check that your water is free of hard minerals!
Know if your water contains dissolved iron!
Check the Total Dissolved Solids in your water!
Get more facts about your water!
Related Questions:
How to fix a leaking Pur water filter: A leaking Pur water filter is usually due to incorrect installation of the filter. Remove the filter and check to make sure that the O ring going around the filter is seated properly in its channel and reinstall.
If the filter unit is leaking by the faucet connection, remove the unit and reinstall it, being sure not to cross-thread the connection and tighten the adapter properly.
Fridge water filter leaking: Sediment filters for a refrigerator have an Oring going around them to make them watertight just like the Oring in a water filter housing.
If this Oring rolls or is forced out of its intended position, it may not seal correctly and result in a leak. If you change your refrigerator filter and it starts to leak, remove it and make sure that the Oring is clean and properly seated in its intended slot.
Then re-install the filter slowly, keeping it very straight when you are putting it in. This will keep even pressure on all sides of the Oring and it will be less likely to move out of position. Put a tiny amount of silicone-based lubricant on the Oring if the filter goes in with great difficulty.
Should I use cellulose or polyester filters? I always recommend using polyester filter cartridges in a whole-house filter housing and in reverse osmosis systems.
This is because cellulose filters are basically paper, and if these paper filters tear, the pieces of paper that come off of them can get caught in your water softener’s valve, or they can make their way to a sink or faucet and cause it to clog.
Polyester filter cartridges are far more durable and can even be rinsed off and reused a few times. And since they only cost a tiny bit more, I feel that they are a better choice.

My maintenance guy installed a new faucet and replaced 3 valves under the sink. The water filter plastic hose that goes from the filter into the valve is leaking. The guy had been back to tighten the lugs to no avail. What’s my next course of action. He’s done.
Hello Janet,
If you have had your water filter system for a while, the first thing that I would check is the O ring inside of the fitting that the tube fits into. When a tube sits inside of an O ring for a long period of time, the O ring develops flat areas where it was pressed against the tubing.
Once the tubing gets moved or even pushed around a bit, the flat area will no longer seal against the tubing. The O ring is likely to be a 1/4 or 3/8 inch O ring which is a very standard size that you should be able to find in your local hardware store. Use a small amount of silicon-based lubricant on the O ring to help it seal around the tubing better.
Hope this will be helpful and thank you for the question.
Paul
Hi Paul
I have a leak at the red pressure relief button but there is no o-ring or screw that I can see after removing the sump. Any idea on what to do next?
Hello John, and thank you for the question.
On some models of water filter housings, the Oring under the red button is very difficult to get at. The screw is often towards the very top of the housings head. I suggest looking one more time with a bright light, the screw should be there.
If you find that the screw is enclosed inside of the housing, the only thing that I can recommend is to put the housing back together, cover the button with a towel and press the button down while you turn on the water. Hold the button for a few seconds and let water spray into the towel. This may flush out whatever debris is causing the button to leak.
If this does not work, you will probably have to replace the housing.
Hope this helps.
Paul
Hey Paul,
You just saved me a TON of time – had a leak after changing the whole house filter but cleaned off the O-ring as you prescribed and it’s sealed! Thanks so much!!
Hello
I have a Aqua Pure tap on my sink that runs the AP8112 filter. Today I replaced the filter. Easy. The tap started to leak a week or more ago. Thinking the tap had a ball valve in it I pulled the spout off and turned the tap on and tried to put a small flathead down to clean any calcification off, only to find it wasn’t a ball valve, hence no hole. Presuming it must be a gate valve I opened and closed it snapping it on and off about 30 times. This has slowed the leak down from a drip every 3secs to a drip every 2.5mins. Almost bought a new tap when I bought the filter at Bunnings today but thought I’d have a go at fixing this first. Any suggestions please ?
Hello Col, and thank you for the question.
It sounds like there is a little piece of sediment stuck on the seal that has worn it down. You could try spraying some C.L.R. cleaner into the filter housing, and then running it through, this could loosen any calcification that has built-up. But it sounds like you may have to replace the tap.
I hope this helps!
Paul
My rain fresh fc 150 is leaking out the top looks like it is coming out of the valve. if i put it to the off position the water flows out the top of my unit. In the other 2 position on and by pass it will slow drip out of the top of the unit.
Hello James and thank you for the question.
In-line filters will often leak because they get some sediment or other grit stuck on the O ring that seals the water from any openings. See if you can get to the O ring under the leak and clean it. Then add a little O ring lubricant to help it seal better.
Eventually, the O ring wears out to the point where it will not seal any longer and the unit will need to be replaced.
I hope this was helpful.
Paul
Hello Paul, my refrigerator water filter is leaking after putting in a new one. a tech is coming over to fix this under a repair plan I have. that two days away if I remove the filter until then will water then come out or will it stop because there is no pressure being put on the filter component.
Hello Robert and thank you for the question.
Not all refrigerators are the same but it may have a bypass lever on it to stop the water going through the filter. If not, you may be able to remove it and still have water if it automatically bypasses.
I hope this helps!
Paul
Hi Paul,
Thanks for taking questions. I had a Water Pur KW1 filtration system in my Forest River Mini Lite. After 4 years it started leaking and flooded the RV, so decided to replace it as it was proprietary and hard to get parts for. I bought a new canister housing with 1/2″ MPT female ports. I have used brass AND plastic 1/2″ fittings (with plumber’s tape) and can not get it to stop leaking at the fittings. Hand tight, a little extra, nothing works. It’s like the fittings don’t seat in the housing. All other connections are fine. Been to the hardware store multiple times. Please help! Thank you.
Hello Mr. Williams and thank you for the question.
There are only a few things that I have found that will cause the fittings to leak on a filter housing.
There may be a crack in the housing that can leak more if you use Teflon tape.
There may be a burr on the treads of the housing which causes the fitting to fit incorrectly.
The treading on the housing may not be standard so the treads on the fittings that you are using may not match correctly.
I would try using a plastic fitting with just 2-3 wraps of tape on it, then insert the fitting using a wrench for about 3 full turns and no farther. If the fitting works correctly and if there are no other issues, that should get you the best chance of it fitting properly.
Other than that, you may want to get a new housing that comes with the correct fittings with it so there is no chance that they will not fit properly.
I hope this was helpful.
Paul
Hello. I have a water filter that has developed a slow leak at the part that rotates to cover or expose the red pressure relief button. Any ideas?
Hello Mark and thank you for the question.
Unfortunately, the Oring that seals that opening is usually very hard to get at but if there you can remove a screw that should be in the center of the top of the lever, you may be able to remove a metal plate that will expose the Oring.
If your type of filter housing can be taken apart, the Oring in the center can be removed, cleaned, lubricated, and replaced. But before you do that, try turning on a sink or two in the home to get a strong flow of water and then turn the lever back and forth several times. This may dislodge whatever has caused the Oring not to seal correctly.
If that doesn’t work and you can’t access the Oring underneath the center of the lever, you are better off just replacing the entire housing.
I hope this helps!
Paul
Very helpful. I was trying to replace the input filter–couldn’t unscrew the tank. Found out I hadn’t opened the valve to release the pressure. Thanks. However, my Kinetico system still will not regenerate. I thought changing the filter might allow more water pressure to flush the system so regeneration would begin. Hasn’t happened yet. Not sure what to do next. Never experienced this before. I’m sold on Kinetico–on second unit, purchased first almost 40 yrs. ago.
Hello Mr. Garzony and thank you for the question.
It seems that your control valve is not advancing. There could be dirt or debris inside of the valve which is preventing the gears from turning.
It may just need to be cleaned out or it could need to be rebuilt if there is any damage to the valve.
I hope this was helpful.
Paul
Hi Paul,
I have an aquasana whole house filter and while replacing the pre filter I accidentally fully unscrewed the red button pressure release, the button and a small spring came off. I could not figure out how to put it back on and tried turning the water back on, water came shooting out of the top. Do you know how to put the red button pressure release back in?
Thank you in advance!
Hello Jarett and thank you for the question.
If you remove the filter housing (sump) and look underneath where the red button is on the top of the housing, you should be able to see a small Phillips head screw with a rubber washer on it that screws into the bottom of the red button.
It may be hard to get at but it should be there if you look. if you don’t see one, it may have dropped into the filter housing or on the floor.
Press the red button into position and you might be able to re-attach it to the screw.
Hope this was helpful
Paul
Thank you Paul,
Your advice on how to fix a leaking water filter helped me a lot.
Fixed the tiny leak.